How To: iMovie Put Picture in Video
In the latest version of Mac iMovie, it can be difficult to figure out how to place a picture inside a video title in iMovie. The latest version of iMovie 10.1.1 changed the way to add pictures. Here is a step-by-step guide to place a picture inside of a movie title, background, or transition.
1. Open iMovie
2. Begin a new project
3. Once in your project, select the Titles tab at the top

4. Select a title – we will use Centered title as an example. Drag this title below to your main project area. It will look like below.

5. Next, select the picture you want to add inside your iMovie video title. Drag that picture into iMovie on top of the title you just created pictured below

6. Next, go to your cropping tool at the top right where your tools for the picture you just added show up. For Style select Fit.

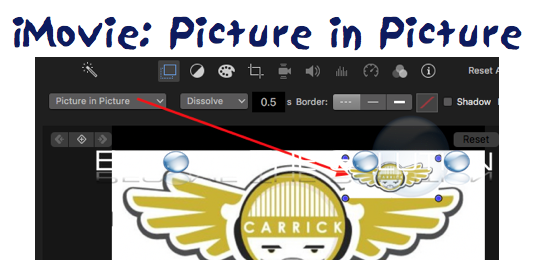
7. Next, select your Video overlay settings tool in the tool bar. Select option Picture in Picture.

8. Now you have a picture inside your title you can move around and resize – like shown below. Yay!
