Easy: Expand Virtual Box Windows (Or any Virtual Machine Disk) VMDK/VDI Disk Size in Mac OS X
Virtual Box does not offer a convenient way to expand a Windows or other virtual machine drive via the storage settings graphical interface.
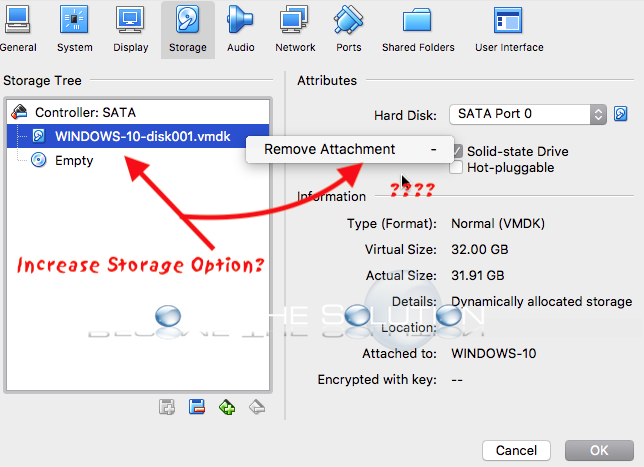
Follow the steps below to expand your Virtual Box VM machine disk using vboxmanage Terminal commands.
- Shutdown your Virtual Box VM.
- Open Terminal in Mac OS X. Navigate to the Virtual Box application folder.
cd /Applications/VirtualBox.app/Contents/MacOS
- Next, we’ll expand our Virtual Box disk. If your disk is in VMDK format, we need to first clone it to VDI format in order to expand the disk successfully. Type the following Terminal command and replace the paths with your disk paths and names. (In this example, our cloned image will be created inside the Virtual Box app, see notes under step 4)
sudo vboxmanage clonehd /Users/dad/VirtualBox\ VMs/WINDOWS-10/WINDOWS-10-disk001.vmdk new-windows-10.vdi --format vdi
Note: (If you try this command on VMDK disk, you will receive an error: VBOX_E_NOT_SUPPORTED VBoxManage: error: Resize medium operation for this format is not implemented yet!)
- The cloning processes begins and will complete when it shows 100%.

The new VDI image will have a new unique UUID. This is because Virtual Box will not accept a duplicate UUID when you add it this way.
Note: The newly created VDI image will be located inside: /Applications/VirtualBox.app/Contents/MacOS
Open this location by right-clicking on the VirtualBox.app -> Show Package Contents and navigating to this location. Copy (right-click, copy) the image to your default Virtual Box images folder (Users/user/VirtualBox VM’s/ in our case)
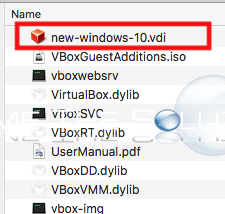
After you copied the VDI, trash the other VDI image inside the Virtual Box app directory.
- Next, we will expand our new cloned VDI image. Type the following Terminal command to change the Virtual Box disk size, in Megabytes. In this example, we change the size of our disk 50 gigabytes.
sudo vboxmanage modifyhd /Users/dad/VirtualBox\ VMs/WINDOWS-10/new-windows-10.vdi --resize 50000
![]()
Note: (If you try this command and receive an error: VBOX_E_NOT_SUPPORTED VBoxManage: error: Resize medium operation for this format is not implemented yet! It’s because you are specifying a size to reduce the size of your image. Remember, the command is not adding space but resizing the entire disk when you specify the space amount!)
VDI and VMDK disk formats only matter when exporting and importing to other applications. Virtual Box can read both formats ok. If you wish to convert your VDI back to VMDK format, use command: sudo vboxmanage clonehd “new-windows-10.vdi” “new-windows-10.vmdk” –format vmdk
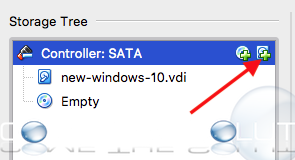
- Next, we attach our new VDI image to our Virtual Box virtual machine. Open Virtual Box navigate to your Virtual Image -> Settings -> Storage highlight Controller: SATA and click the + next to SATA controller. Select Choose existing disk and add your new disk. Click OK.
- Boot your virtual machine. Once it has come up, we need to present the new space to Windows we added to our VDI image. By default, Windows see’s the new space unallocated.
- On your Windows Desktop, Right-Click on My Computer and choose Manage. Select Disk Management under Storage.
Find your main Windows partition and right-click on it. Select Extend Volume… pictured below.
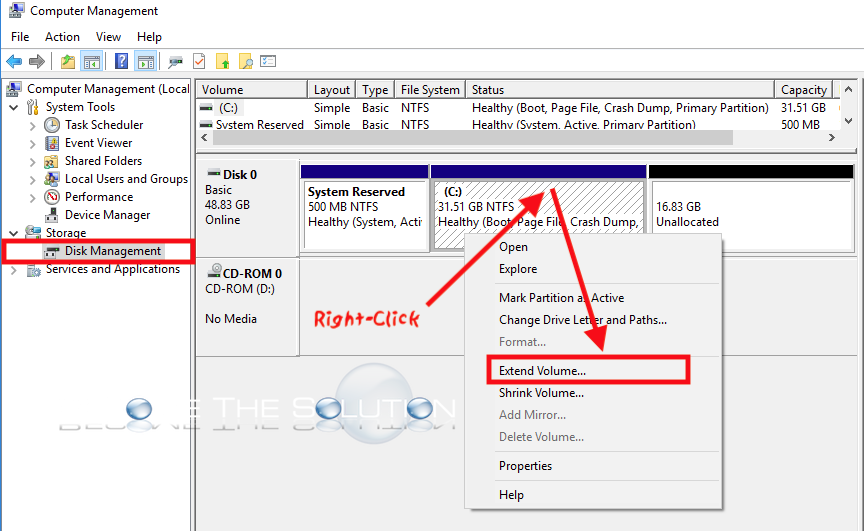
Follow the prompts to add the unallocated space you created to your Windows partition. The space will be presented immediately. And just like that, your Windows partition is increased!

Comments 1
Hi there,
I've a problem in the first step, when cloning my vmdk file. Terminal answers
VBoxManage: error: Could not find file for the medium '/Users/santiago/VirtualBox VMs/Windows-XP-SP3.vmdk' (VERR_FILE_NOT_FOUND)
when Windows-XP-SP3.vmdk is the name of the vmdk file.
Any hint??