Using OpenSSL for Windows to Create an SSL Certificate
This guide demonstrates how to create an SSL (Secure Socket Layer) certificate for a web based application. This does not include certificates for Internet facing applications. An SSL certificate is needed for an application or website that uses SSL. The guide assumes you already have a valid CA purchased and we will use that CA to sign a new request from. You can also read our article for Creating an SSL Self-CA Signed Certificate in Windows.
An SSL certificate is used to pass information from a host to client in an encrypted manner. This encryption provides superior security. Additionally, SSL provides authentication during a transfer, so you aren’t authenticating with someone you shouldn’t be. For Internet applications, this authentication is done through a master CA (Certificate of Authority). When you purchase an SSL, the SSL is signed with the domain name (example.com) and store in the purchaser’s master CA vault. At that point, Web Browsers verify your CA against other CA vaults to ensure it’s authentic in nature. This is extremely important for online credit card transactions.
SSL is important because it gains customers trust when browsing or performing an action. It also lets a user know they are performing a secure transaction or act on website or application. A visual indicator of SSL is green and a sitelock icon pictured like below.

Credit Card transactions performed online required PCI (Payment Card Industry) compliance in order for a credit card merchant to process transactions. SSL plays a major part in this compliance.
Definitions:
Public Key: object you publish to the world to allow others to securely communicate with you over SSL
Private Key: the object you keep secret and allows you to encrypt and decrypt SSL communication.
To get started, we need to create a certificate signing request. You must know the exact URL of the website or application to create the SSL request for. In this example, we will renew a certificate for an application first by generating an SSL signing request.
Generate a Certificate Signing Request with IIS
- On the server with IIS, go to Administrator Tools -> Internet Information Services (IIS)
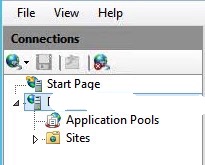
- Select the server name in the connections list.
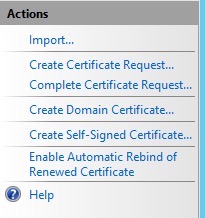
- Select Create Certificate Request in the actions menu on the left.
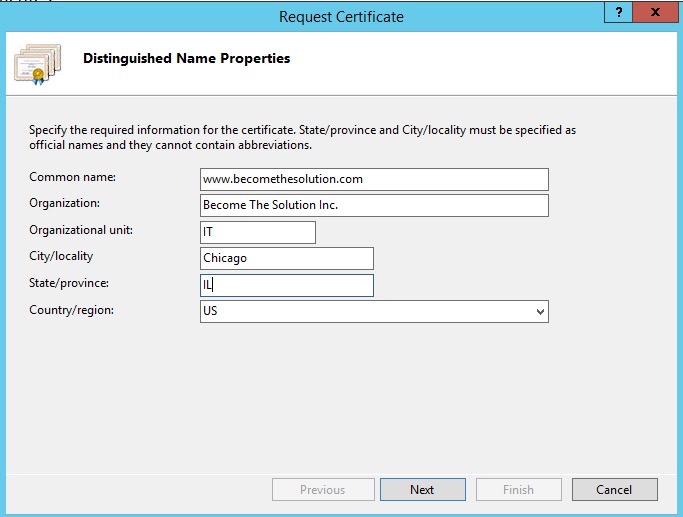
- You will be at the Distinguished Name Properties screen. It is absolutely important this information is as accurate as possible.
- Common Name: the complete fully qualified domain name for certificate
- Organization: Registered organization
- OU: department issuing certificate
- City: the city
- State: the state
- Country: country code
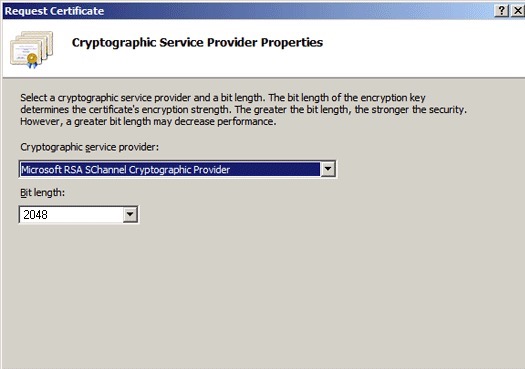
- The next screen is Cryptographic Service Provider Properties
- Select the cryptographic service provider. The default is Microsoft RSA SChannel Cryptographic Provider.
- It is recommended to use 2048 bit-length or higher.
- Next, name the certificate request csr.txt
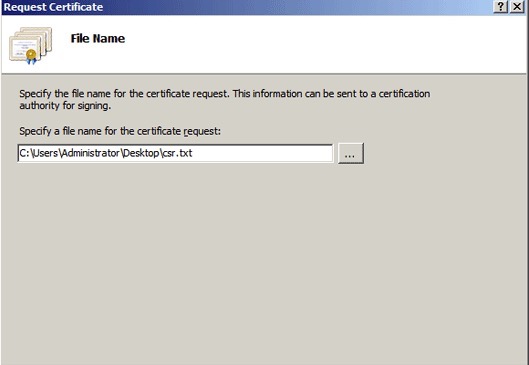
Now, we will use OpenSSL to create an internal signing request. If this request was for an external, Internet facing application, the request would be sent to the public CA issuer and then returned to you with a certificate file.
Signing the Certificate Request
-
Download the OpenSSL binaries located here
-
Install. You may need to install Microsoft Visual C++ 2008 Redistributables as SSL relies on this package.
-
Now, create a new folder on your desktop. Call it certs.
-
Next, open a windows command prompt. Start -> type cmd in run.
-
Set 2 items
- In command prompt, type cd \certs
- In command prompt, set OpenSSL default folder.
- Type set RANDFILE=c:\certs\.rnd
- Type set OPENSSL_CONF=C:\OpenSSL-Win32\bine\openssl.cfg
-
Ok, now run OpenSSL. Type c:\OpenSSL-Win32\bin\openssl.exe
-
You will be at OpenSSL> prompt in command prompt similar to below.{loadposition adinarticlebottom

-
Commands to sign the request vary based on your requirements, but we can sign this request using the following parameters
- ca -policy policy_anything -config openssl.conf -cert certs/ca.cer -in /certs/csr.txt -keyfile keys/ca.key -days 3600 -out certs/iis.cer
- We signing the public key of the certificate with the organizations trusted root certificate, for example, *becomethesolution.com.
-
You will recvieve a similar prompt 1 out of 1 certificate requests certified, commit?
-
Type y
-
Then you receive message Write out database with 1 new entries – Data Base updated
-
Go back into IIS -> Directory Security and select Server Certificate button.
-
Browse the new certificate by OpenSSL
-
Use the default port number 443
-
Click Finish.
-
Now we need to export the certificate for where it will be used to be installed.
-
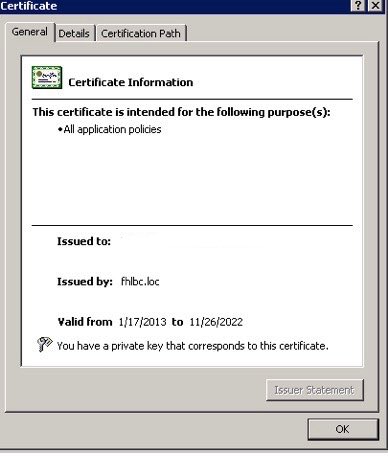
In IIS, go to Website Properties -> Directory Security Tab -> View Certificate
-
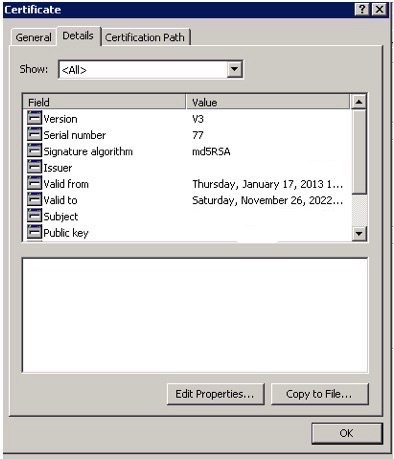
Click on Details then click in bottom right Copy to File…
-
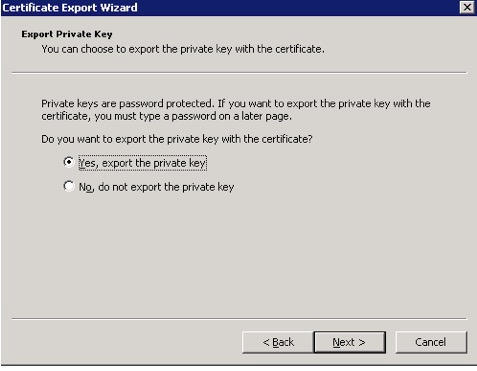
Click next. Select Yes, export the private key. This is a critical step. Failing to do so will cause the SSL to fail.
-
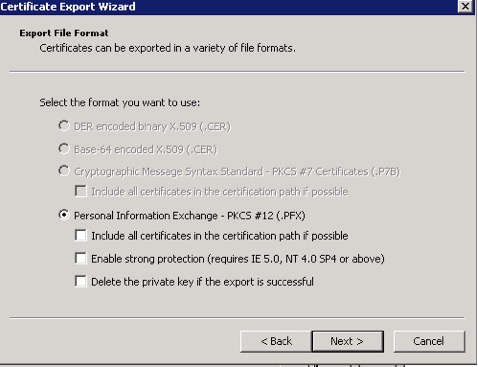
Uncheck Enable Strong Protection and click next. The 3 checkboxes below should be not be checked pictured below.
-
You are prompted for a password. Type in something for this.
-
Finally, choose an export path. The default file type will be a PFX file. Some systems, such as Unix, have a difficult time handling these file types. You can go to SSL Converter and select from other file types including PEM/DER/P7B.
- You're done!
*Remember* - you can purchase your Certificate of Authority now at our online store located here
* Please use the comment form below. Comments are moderated.*

Comments