How To: Mac X Change DNS Servers
Your Mac uses DNS to be able to connect to any internet domain address – like http://becomethesolution.com. Basically, without DNS you would never be able to type a web address name into your web browser and have it resolve. You never need to worry about managing your DNS because your ISP (Internet Service Provider) (such as AT&T or Comcast) automatically pushes their DNS to your home router. Thus, all computers connecting to your router use the same DNS servers.
When you purchase Internet from an ISP, you are essentially paying to use their DNS servers. There are many public and private DNS servers you can use. Some private DNS servers promise 100% uptime but come with a price.
What should I do when my Internet is down?
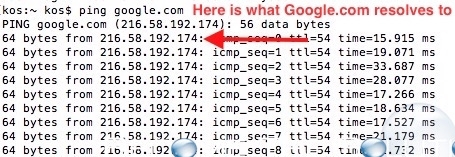
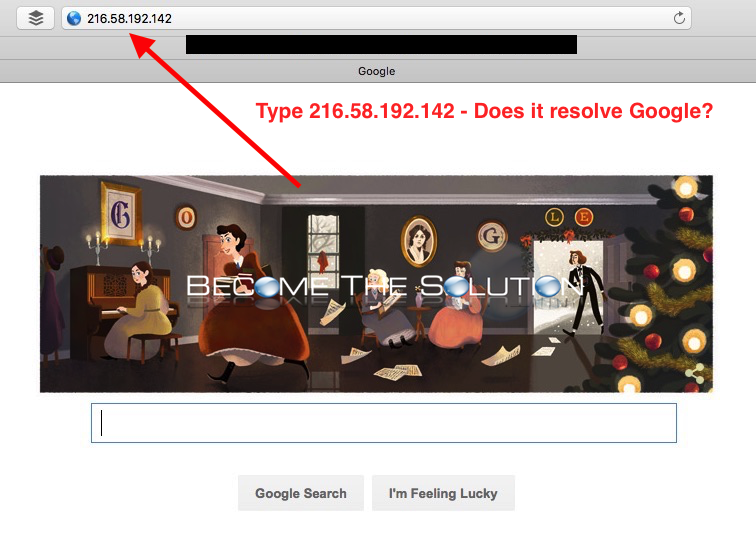
The next time your home Internet “is down”, check first to see if DNS is an issue. For example, if google.com is not resolving in your browser, type 216.58.192.142 instead. If the IP address resolves, you are having a DNS issue but your Internet connection is still working.


Remember, you can use any DNS servers you decide. Google DNS is a free and reliable DNS servers you can use to help ensure you will almost never have a DNS issue. In this example, we will add Google DNS to our Mac computer network settings while still keeping our ISP DNS.
1. Open Network Settings -> System Preferences -> Network

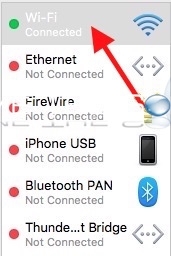
2. Select your network connection. We are using our Wi-Fi network connection so we’ll select Wi-Fi. If you are using a hard Ethernet cable, choose Ethernet. Your active connection will be green.

3. Click Advanced.

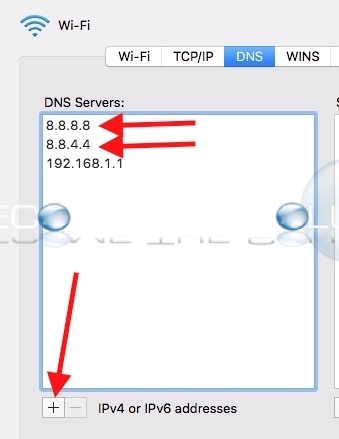
4. Here, we see our current router DNS server added by default – 192.168.1.1. We are going to add Google DNS Servers 8.8.8.8 and 8.8.4.4 to the top of the list.

5. Click OK. It will take you to Network settings screen then click Apply.
Now, your Mac computer will use Google DNS. Should Google DNS stop working or resolving domain names, it will try your ISP DNS you still have in your list. Talk about some sweet redundancy!


Comments