How To: Configure POS-X Thermal Printer Network Ethernet

Did you recently replace your kitchen receipt printer for your restaurant? Is the printer model a POS-X thermal printer? Your new printer out of the box will need to be configured on your restaurant network in order to work and print receipts with your POS System. These printers do not come with manuals or instructions for configuring so we put together a quick and easy guide.
What you need…
-Old POS-X Printer
-New POS-X Printer
-Windows machine connected to same network (router) as your new POS-X printer
1. On your new and old POS-X printers, we will need to print configurations off them.
Note: Ensure there is paper in the printers to be able to print.
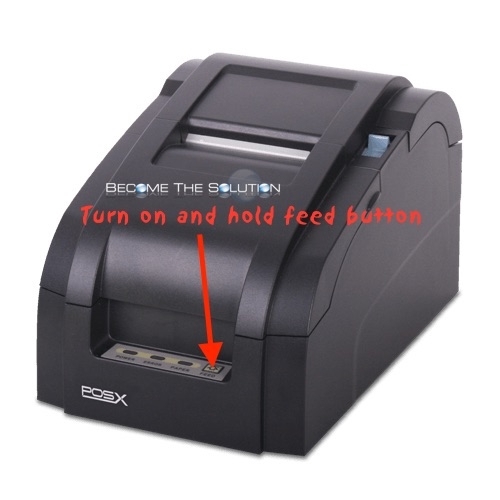
2. Power off the printers. Next, hold the down feed button and power on the printers while continuing to hold the feed button.
3. The printers begin printing their network configurations. A network configuration example is pictured below.
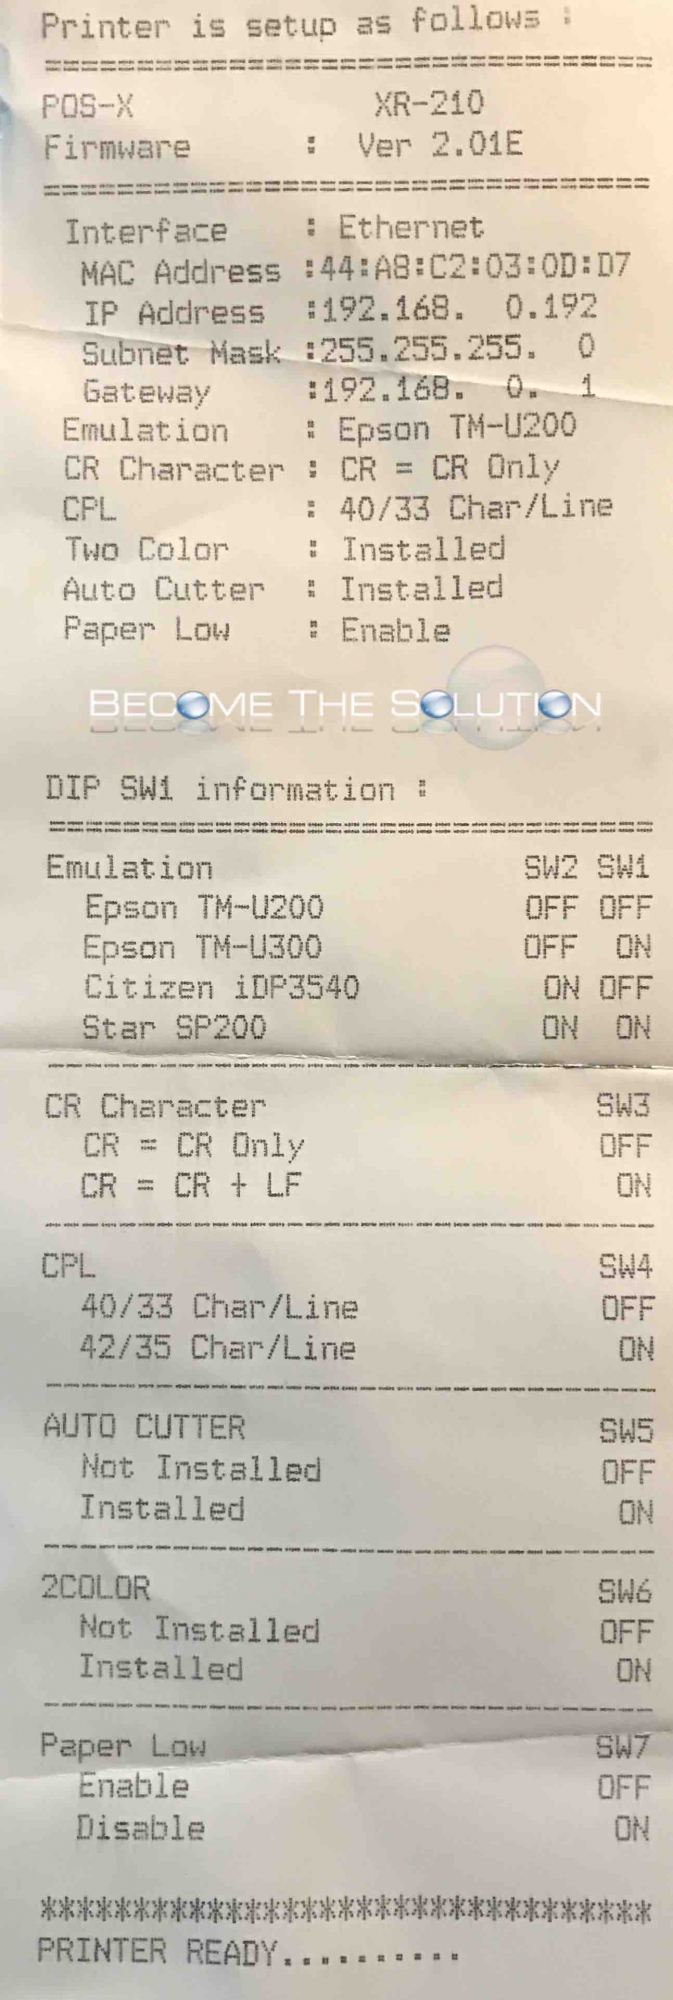
Note: We want to configure our new printer with the exact network configuration as the old printer.
4. Plug in your new POS-X printer to your restaurant network. This requires an Ethernet cable (you can re-use your Ethernet from your old printer) to be plugged into the back of the printer and into your restaurant router. Once plugged in, check to make sure you see a green and amber light on the Ethernet port of the printer.
5. Now, we’ll configure our new POS-X printer based off the old printer configuration. On your Windows machine, download and install EtherConfig Utility. Once installed, open EtherConfig (Start -> Programs) in Windows.
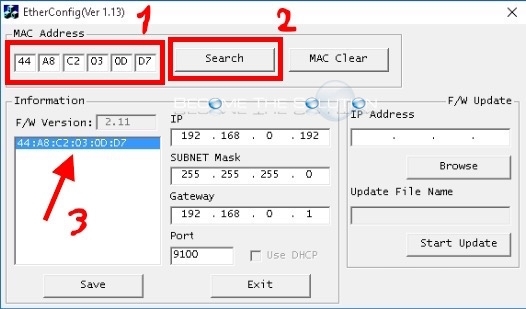
6. In EtherConfig, type the new POS-X MAC Address into the field shown below. This will search for our new POS-X printer so we can configure it.

Note: If EtherConfig cannot find the printer, ensure your Windows machine is connected to the same network / router as your POS-X printer. Easiest way is to trace the Ethernet cable back to the same device.
7. EtherConfig finds our POS-X printer by it’s MAC Address. Now, we will update the new POS-X printer IP, Subnet Mask and Gateway with the information from our old POS-X Printer (Remember, we printed the old pos-x configuration out so just copy the numbers) Click Save after. EtherConfig will confirm the save.
8. And like that, your new POS-X printer will be ready to print again. No further configuration should be needed. Test printing receipts to the new POS-X printer from your POS system.
This guide assumes you replaced a POS-X printer that is the same or similar model. If a new model, your POS system may need new drivers installed to support the new printer. If you are installing a new POS-X printer, you can still follow this guide but will need to configure the printer with new IP information. For more info, check here.
Comments