Mac OS X Sysdiagnose – Advanced Mac Troubleshooting Diagnostics
If your Mac is suddenly suffering hardware or software issues, or is generally acting up you can run sysdiagnose in Mac OS X Terminal. Sysdiagnose compiles a number of advanced technical reports for expert Mac users to review and troubleshoot appropriately. Sysdiagnose will output the following information in a tar.gz file.
- Crash report
- Input/Output details
- Disk information
- Compiled system profiler report
- System logs (including kernel logs)
- Filesystem usage report
- Memory usage and processes details
- Powermetrics
In reality, Sysdiagnose is ran and performed by Mac OS X technical specialists including Apple store engineers (Genius Bar) and authorized Mac repair shops. The sysdiagnose report is run on Mac X systems as a last or first resort to solving and understanding complex technical hardware and software issues.
Get Started Running Sysdiagnose in Terminal
1. Open Terminal (Applications -> Utilities -> Terminal)
2. Type the following command in Terminal. Be prepared to wait about 2 to 5 minutes for Sysdiagnose to completely run.
sudo sysdiagnose –f ~/Desktop/
You will receive the following warning prompt:
This tool generates files that allow Apple to investigate issues with your
computer and help improve Apple products. The files might contain personal
information found on your device or associated with your iCloud accounts and/or
AppleID, including but not limited to your name, your user name, your email address
and email settings, file paths, file names, downloads, your computer’s IP addresses,
and network connection information.
This information is used by Apple in accordance with its privacy policy
(www.apple.com/privacy) and is not shared with any other company. By using
this tool and sending the results to Apple, you consent to Apple using the
contents of these files to improve Apple products.
Press 'Enter' to continue.
3. Confirm and press return.
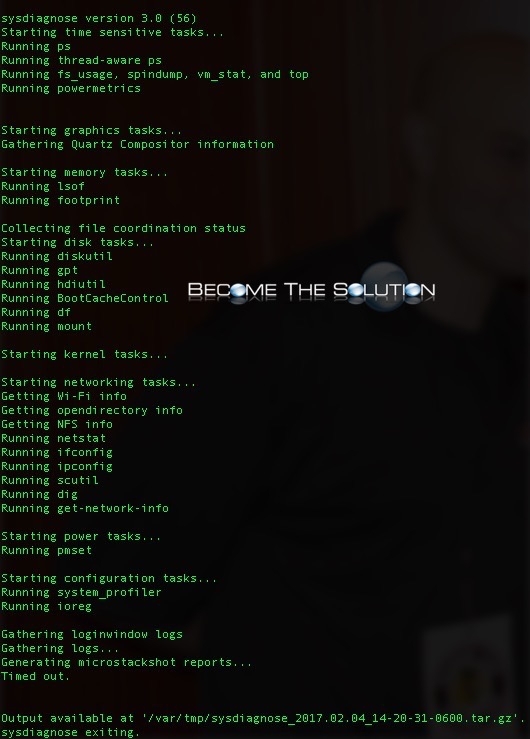
4. Sysdiagnose begins running. Below is what you might see as the process runs.

sysdiagnose version 3.0 (56)
Starting time sensitive tasks...
Running ps
Running thread-aware ps
Running fs_usage, spindump, vm_stat, and top
Running powermetrics
Starting graphics tasks...
Gathering Quartz Compositor information
Starting memory tasks...
Running lsof
Running footprint
Collecting file coordination status
Starting disk tasks...
Running diskutil
Running gpt
Running hdiutil
Running BootCacheControl
Running df
Running mount
Starting kernel tasks...
Starting networking tasks...
Getting Wi-Fi info
Getting opendirectory info
Getting NFS info
Running netstat
Running ifconfig
Running ipconfig
Running scutil
Running dig
Running get-network-info
Starting power tasks...
Running pmset
Starting configuration tasks...
Running system_profiler
Running ioreg
Gathering loginwindow logs
Gathering logs...
Generating microstackshot reports...
5. Once Sysdiagnose completes, a new window will pop up to your Mac temporary folder. The path is /var/tmp/ and inside you will have your Sysdiagnose file - sysdiagnose_2017.02.04_14-20-31-0600.tar.gz – the file will vary in size but should be between 10 and 30 megabytes.
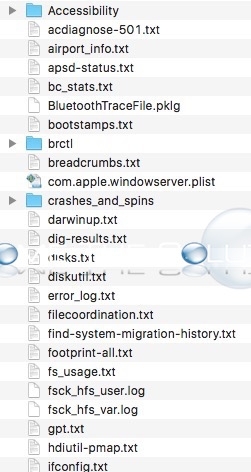
6. You can open the .tar.gz file by double-clicking it. This will contain a folder of over 75 files and folders with the information Sysdiagnose collected.

Note: Sysdiagnose collects system info including wireless networks, network configurations, and system account usernames. While the info isn’t necessarily confidential, you should be aware it is being collected if you are sharing these reports.
Remember, Sysdiagnose compiles a detailed report of your Mac OS X machine in attempt to troubleshoot system software or hardware problems. Learn more about troubleshooting Mac X issues.


Comments 1
Hello, ran Sysdiagnose and immediately received - Libsysdiagnose error connection invalid.
Ron