How to use eGPU with Mac Mini + Windows Boot Camp + macOS Catalina 10.15.X (Pure eGPU)
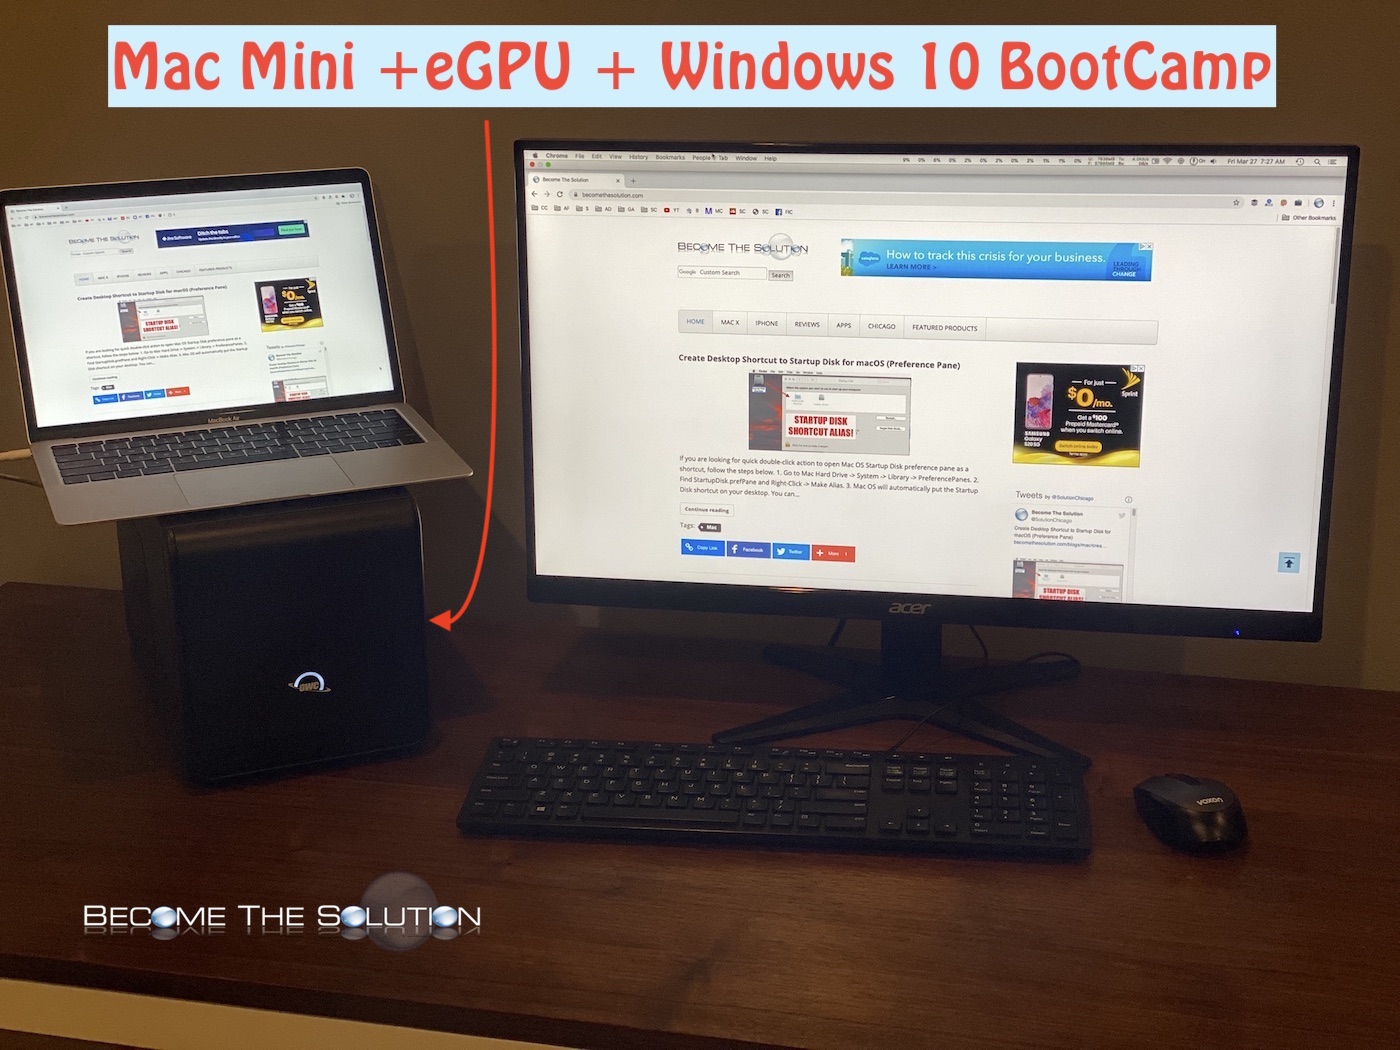
In this guide, we setup a OWC Mercury Helios FX 650 eGPU (external graphics processing unit) chassis using a Radeon RX 580 8GB GDDR5 graphics card installed on a 2018 Mac Mini. This setup includes using the eGPU as the main video card for the Mac Mini (Windows Boot Camp and macOS).
This guide should work the same for any eGPU that is compatible with macOS including Apple’s BlackMagic, Sonnet Breakaway box, Razer Core, Akitio Node, StartTech, and PowerColor Mini Pro. Please share success stories for other eGPU’s in the comments below.
Mac Mini Configuration (Maxed out 2018 Version):
2018 Mac Mini 3.2 GHz 6-Core
64 GB 2667MHz Ram
2 Terabyte SSD
macOS Catalina 10.15.4
Windows 10 1909 (Build 18363.720) Boot Camp
OWC Mercury Helios FX 650
Radeon RX 580 8GB GDDR5 installed
Getting Started –
Leave your eGPU UNPLUGGED for now.
1. Use Boot Camp Assistant to create your Windows partition. Download the latest version of Windows 10 64-Bit from the Microsoft site here and install.
2. Once Windows is installed, run Windows system updates and ensure it is up to date. (Several users online argue against this, but installing the latest updates for Windows as of this article worked fine in our case).
3. Next, (still booted in Windows) go to BootCampDrivers and download the Windows drivers for your graphics card. In our case, we used Adrenaline Red Gaming Edition (Best FPS).
4. Next, (still booted in Windows) plug in your eGPU to the Mac Mini via Thunderbolt connection. Windows may attempt to install drivers for the eGPU automatically…you can cancel this.
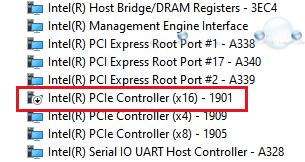
5. Next, (still booted in Windows) if you are running a Mac Mini 2018 disable the Intel(R) PCIe Controller (x16) – 1901 port in Windows device manager. You will need to disable this port or Windows may fail to boot properly. See below.
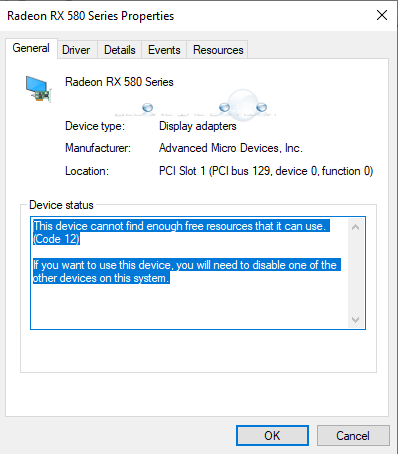
6. Next, (still booted in Windows) install the BootCampDrivers you downloaded in step 3. Your graphics card might show in Windows device manager but with a yellow icon and a Code 12 error. This is ok. However, if the drivers fail to install because no card is recognized, plug the eGPU into another Thunderbolt port on your Mac, or reboot to Windows again and hot plug your eGPU.
7. Unplug the eGPU and boot back to macOS. We need to disable macOS boot security next.
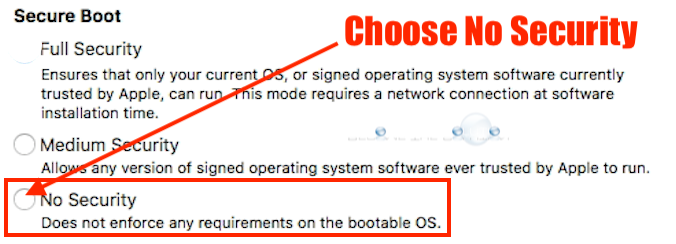
8. Boot to macOS recovery mode and go to Utilities -> Startup Security Utility. Choose No Security under Secure Boot.
9. Boot back to macOS.
Next, we are going to install a custom configured efi boot file for Windows BootCamp to recognize the eGPU on boot.
10. Download and install Clover Configurator for Mac OS X. If you get the “can’t be opened because of” error, see this article.
11. Download and unzip apple_set_os.efi (bootx64.efi) v0.5 from here or here.
12. Open Clover Configurator select Mount EFI -> EFI on BOOTCAMP -> Mount Partition.
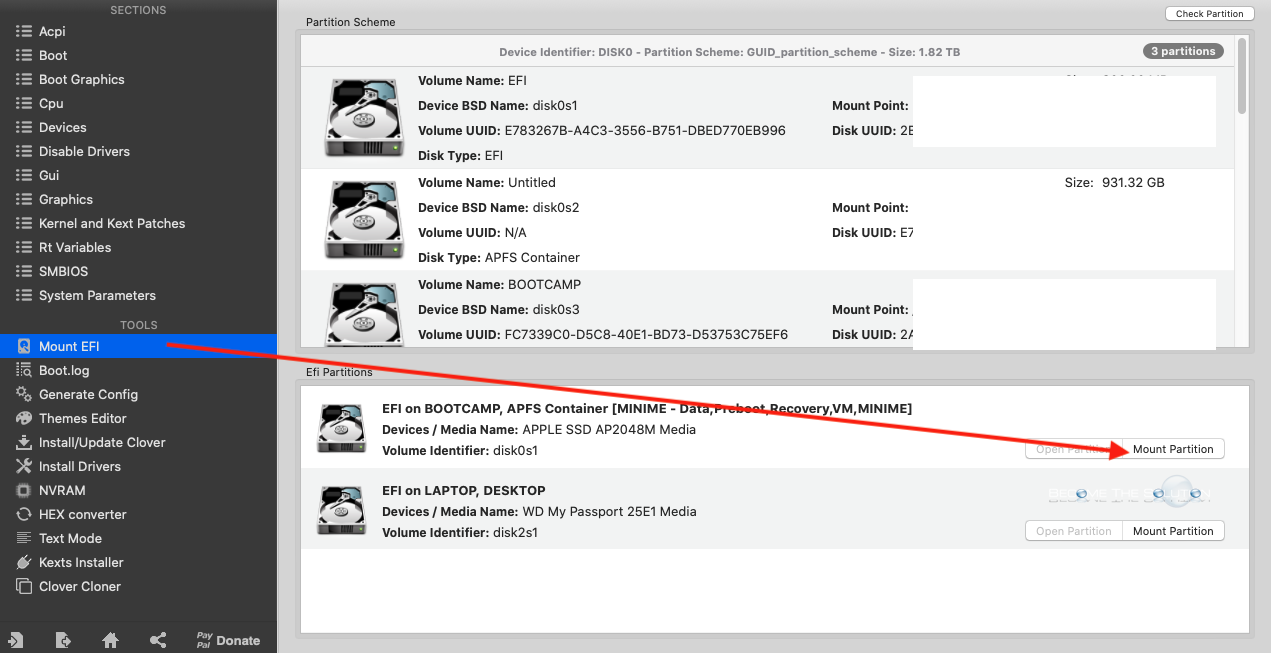
Enter your macOS password.
13. On your Desktop, open EFI Drive/EFI/Boot/.
14. Rename bootx64.efi to bootx64_original.efi.
15. Copy the bootx64.efi you downloaded to /EFI/Boot.

16. Reboot to macOS.
17. Set the startup disk to Windows BOOTCAMP and shutdown your Mac Mini.
18. Plug in your eGPU via Thunderbolt to your Mac Mini and connect your monitor(s) to the eGPU graphics card video outputs (HDMI, DVI, Display Port).
19. Finally, boot the Mac Mini. You may not see the Windows boot logo during this time and your monitors may loose video signal briefly. In a minute or so, your Windows 10 desktop should appear.
Note: Ensure your Mac Mini is not connected to any other monitor sources other than the eGPU. Otherwise, it may cause display issues when you boot. You want to avoid using the Mac Mini’s onboard Intel Graphics.
To switch booting between macOS and Windows Boot Camp, use Startup Disk in macOS and Boot Camp Utility (located in Control Panel) in Windows.
Please use the comment form below if you have issues OR can share a success story with another eGPU and graphics card.

Comments 18
it works!
Was afraid to Hack my new Mac mini which I was hesitant to buy cause I haven’t had a need to use my Mac’s for other than vintage computing, video games and emulators for a while. Kinder rely on phone and tablet for everyday needs. But I’m so glad this worked for my new 2018 Mac mini and Windows 10 for my Steam Games. Had a Windows 7 BootCamp on a Mac Book Pro with those games that I lost functionality with that I never finished playing. Thanks.
One word, “Security“ can I change it back to a more secure Boot setting in Secure Boot. Thank’s again.
Thank you so much ! It works really great (Mac mini 2018 razor core x radeon 580). Just worry about one thing : Is it safe to let "No security" option (safe boot) like that ?
Thanks again
Thanx! Worked great for me in one go. mac mini 2020 + black magic egpu (radeon pro 580)
Thanks so much for this walk through. Had to reboot twice in Step 19, but it worked!
Has anyone been successful in getting this process to work with Core X and Vega 56?
Confirmed this does not work with 1909
Hi there! Will this combo egpu+580 work in Mojave 10.14.6 without having to unplug it each time before booting Mac OS? I'm not interested in bootcamp at this time, but OWC lists those issues on their site and I want to clarify if any of them have been since fixed.
"2018 Mac mini owners can avoid potential problems by making sure the external display is connected directly to the mini when booting, then, after the macOS Desktop has loaded switch the display cable to the eGPU."
What about Catalina without Bootcamp?
"2018 Mac mini: As of 10-18-19, not recommended with 10.15 Catalina"
"Tests are ongoing, but at this time, if you are running a 2018 Mac mini with an eGPU like the Helios FX, on 10.13.4 High Sierra – 10.14.6 Mojave, and you are not experiencing any issues, it may be a good idea to delay your upgrade to macOS 10.15 Catalina for the time being."
Works perfectly with Catalina 10.15.4
I still get the error 12, i forgot to mention.
If i reboot directly with my egpu and no HDMI, nothing will happen other than black screen.
If i do with hdmi + egpu hot plugget, i get the error 12.
At some point, did windows recognize the eGPU when you installed the drivers though?
IT did it, it recognised the vega 64 I have and I installed the drivers following the steps provided in the website. I tried with the legacy software since it was written for Mac mini that was the recommended one but I guess I will try again.
I just deleted windows and restarted the process again from the very beginning installing up w10 bia bootcamp.
Hi,
Thx for the post, unfortunately I did all the steps 1 by 1 but got no luck.
Im currently running 10.15.4 macos and windows 18362.720
Dont know where I may be doing wrong.
Just to clarify, step 13 when you say: Open on desktop, u mean going to "open partition" in the clover software?
that is the only point i was not sure but all the files u mentioned below were there.
I know the efi was replaced because when rebooting on windows, a message appears and says something like "plug now your egpu and press any key".
So I am a bit lost, could you help me?
I am more than glad to provide more details if needed.
Hi Kevin,
That's correct. You've done it correctly. When it boots, click a key for it to see the eGPU. You can leave it plugged in already in most cases.
And to add, you don't need to click a key, it should see it and boot automatically. I would say 1 out 8 times this wont work and you have to reboot again. Ive found that an HDMI splitter works well here so you can switch to the onboard graphics card on the Mini (windows will still boot up) and reboot windows if your eGPU doesn't catch. Also, the HDMI out on the eGPU graphics card I've had the most success with.
I think it was written something like, “if you don’t press any key it will boot with the “original efi” meaning it would boot as usual (as that was the file we replaced by changing the name)
So can u confirm I don’t need to press any key?
When I was reeboting, in the same black screen I was asked to press any key, I could see Something like “graphics detected“:
-The intel processor one
-Vega 64
In my scenario, I don't have to. What I recommend you do it keep your native display plugged in to see the message and take action. Wait for windows to boot and make sure after booting your eGPU is recognized still in Windows Device Manager. After words, switch to the output on your Vega card. I had to do this in the beginning a few times before cold booting worked. Not sure if it was coincidence or not. So as long as your eGPU was recognized at some point and you didn't have the error 12 message then as well, it should work.