How To: Install Mac OS High Sierra 10.13 – RAID 0 Configuration

RAID 0 is a popular disk setup solution to achieve the fastest possible read and write disk speeds by splitting data between two or more hard drives. The latest version of Mac OS X High Sierra (10.13) does not allow you to simply install to any kind of RAID configuration. This has frustrated a lot of the Mac community. Until Mac OS X High Sierra officially supports RAID configurations, follow the steps below to setup a fully functional RAID 0 configuration.
*You will not be able to install system updates from the App Store on your live RAID volume. However, see our workaround at the end of guide. *
In order to install the latest version of Mac OS X onto a RAID 0 slice, you must clone a copy of your Mac OS X installation straight to the RAID 0 drives (not a restore, such as Time Machine, which will not work). To accomplish this, you need an external hard drive and a copy of SuperDuper software in addition to your RAID 0 drives. We will use the same Mac machine (that will use RAID 0) to perform all the steps below. This method uses hardware RAID and is not a software RAID.
Note: We strongly recommend taking a full backup (Time Machine) to another drive just in case when performing these steps! Save yourself from an accident!
- Use SuperDuper to clone your existing copy of Mac OS to the external drive. If you want to a fresh copy of Mac OS High Sierra instead, clone a copy of a fresh install of High Sierra to the external drive using SuperDuper.
Note: Be sure to complete your SuperDuper clones on the same type of Mac you will install the RAID 0 configuration on. This is important because your Mac OS High Sierra clone will have drivers and system files specific to that machines hardware.
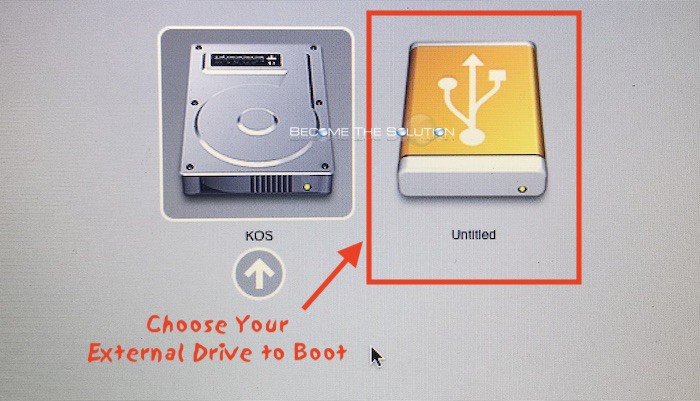
- Next, boot from the cloned external drive we created. Plug in the drive and hold down the option key and choose the external drive install media.
- Now that we booted up from our external hard drive, we can manage our Mac’s internal hard drives and create our RAID 0 array. Remember to only create a RAID 0 array with the same model and capacity size drives.
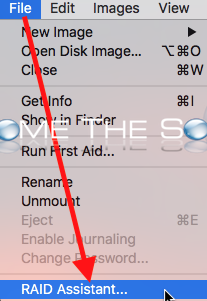
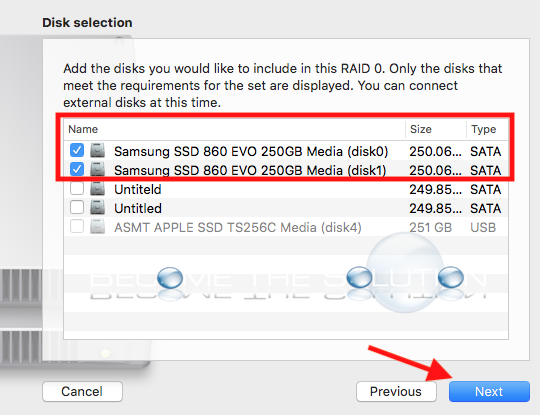
Open Disk Utility in Applications -> Utilities and create your RAID 0 array shown below.
Go to File -> RAID Assistant
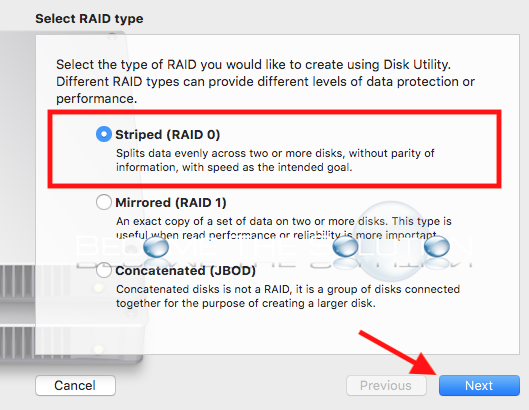
Select Striped (RAID 0)
Select your 2 internal hard drives to create the RAID array from
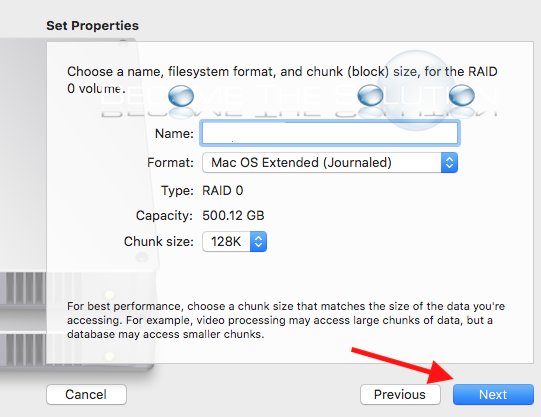
Name your single RAID drive. For Chunk size, choose a lower size if you will be using the RAID for regular needs (email/browsing/word processing.) For video editing, choose a higher chunk size.
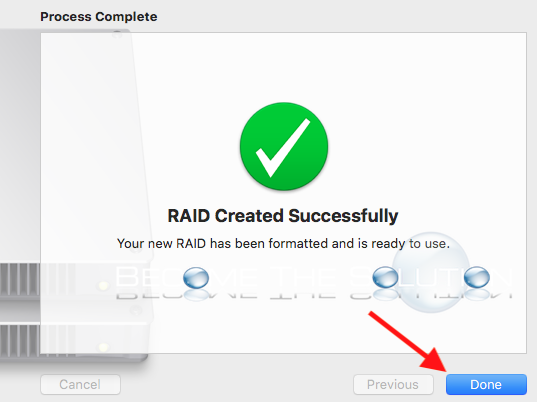
Success screen appears
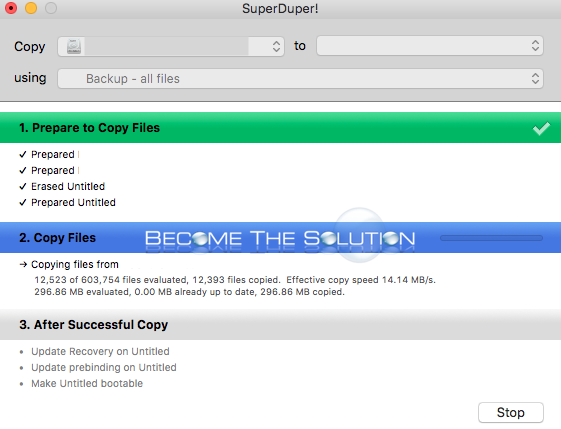
- Open SuperDuper and copy the external drive to your new RAID 0 drive.
The copy will complete successfully. Finally, go to System Preferences -> Startup Disk and select your new drive and restart. The first restart may take a little time as your boot files load for the first time.
You can confirm your successful RAID 0 in Disk Utility.

If system updates are available in the app store they will appear, but do not attempt to install them. Your computer will fail installing them and you will likely damage your OS installation! App Store Application updates will install OK. See below workaround.
Install Mac OS 10.13 System Updates on RAID drive
- Time Machine backup your current RAID Mac OS System.
- Boot to recovery mode. Destroy your RAID drive configuration and reate 2 separate Mac OS Journaled disks.
- Time machine recover to one of the two disks, boot up, and install updates from App Store.
- After updates are installed, create a new Time Machine Backup.
- Use SuperDuper to create a clone of your Mac OS with installed updates.
- Finally, boot from a different Mac OS High Sierra install disk. Create your RAID configuration and restore (using Disk Utility) or copy (Using SuperDuper) back to your RAID drive configuration.
Now you have the latest Mac OS X system updates installed on your RAID O configuration drive again. The entire process took us under 1 hour using SSD drives and USB 3.0.
Comments 11
Ok, thanks, I will try this weekend, with HFS of course.
We built our RAID 0 with - Mac OS Extended (Journaled)
So we can not use APFS to get Raid0 working on High sierra, right?